My Pretties

Total Pageviews


Showing posts with label L.A. Girl. Show all posts

Saturday, October 22, 2011

Finger Painting: Frankie Fingers

Hello, my Pretties!

It feels like ages since I last blogged. So much going here on but I won't go into that. All that matters is that I am here now!

Last blog post was on a NYX nail polish by the name of Lime. I didn't like the color too much until I decided to do a Halloween inspired Frankenstein nail look. This was my first serious try at drawing on nail art. I cannot draw with a paper and pencil so this was such a feat! But it really was fun.

I got my inspiration, or should I say, I copied this look from goldiestarling on YouTube. She has an awesome channel so I do hope that you will check it out!

Here is the direct link to goldiestarling's nail tutorial:
Halloween Nail Tutorial Lil' Frankies

Here is my version of this really cute look.


3 coats of NYX in Lime.

Add a head of hair with black nail polish.

Add some sideburns with black nail polish.

Dot on two eyeballs with white nail polish.

Draw on some eyebrows with black nail polish.

Draw on the mouth and stitches with black nail polish.
(Sorry for the blurry image. You get the idea.)

Dot on two irises on the eyeballs with black nail polish.

Make sure the whites dry well or else the eyeball
will travel like mine did here.

I used the thumb as my accent nail.
All other nails were given a French mani with black tips.

But the sweet-tart wanted me to do all the nails Frankie.

And here is the final full set...top coat and all.

Nail ingredients used:
NYX Nail Polish in Lime
L.A. Girl Matte Flat Finish Nail Color in Matte Black
Avon Nailwear Nail Enamel in Cloud 9
Wet n Wild Clear Nail Proctector

So, I know goldiestarling's was so much better but this was really fun. I know most of you will be able to do this very well. If I did it semi-good, some of you will rock this look!

I just thought that this was a fun way to feel festive this Halloween season. I highly suggest that you all try this one!

SIDE NOTE:
Since I first did this look using the actual nail polish brush and a tooth pick, I did get a nail art brush from my sister. She begged me to do her some Frankie Fingers so I did and in return, she gave me a Milani Nail Art Polish in a light green. I just use the brush now! I wipe off the green polish and dip it in the black nail polish and the mouth, stitches, and eyebrows can be drawn on so much better. I highly suggest you get one!

Luv & Luk,
--L.

♥♥ All items mentioned in this post were purchased by me with my own money. ♥♥


Thursday, September 15, 2011

Nail Art: Pretty Petals

Hello, my Pretties!

Yesterday I shared with you my Pink Wednesday post, which you can see HERE, and today I decided to add a little oomph to the pretty pink polish.

Here is attempt number two at nail art! My first was an embarrassing attempt but I still shared that with all of you. If you missed it, you can laugh at it HERE.

Wet n Wild Wild Shine
Nail Color in Frosted Fuchsia
I actually polished my nails in the car. Yup, that's the steering wheel in the background! And no, I wasn't driving at the time. I was parked outside my daughter's elementary school waiting for school to let out.

Here are the materials used.
4 Shades of nail polish, an orange stick,
and a sheet of paper.
The orange stick was used to create the design. You could also use a toothpick, a pen, or even a pencil. You know, if you don't have a dotting tool. I don't. The sheet of paper was so that I could pour out a little nail polish onto it and dip my orange stick into it. It just makes things easier. For me, anyway.

Nail polishes used.
Here is a closer look at the nail polishes I used.

Wet n Wild Wild Shine Nail Color in Frosted Fuchsia
L.A. Girl Matte Nail Color in Baby Pink
Wet n Wild Megalast Nail Color in (insert name here) The label rubbed off...
Ulta Nail Lacquer in Limelight

Aww...
Here is the finished look! I only did this on my thumb nail on my left hand. For obvious reasons...I am a righty and there is more work space on my thumb nail! Remember guys, I'm new at this nail art stuff.

I first polished the entire nail with Frosted Fuchsia. Next, I put a "round" spot of yellow to be the center of my flower. After that, I dotted Baby Pink dots all around the yellow center. And lastly, I used Limelight to draw on a stem and a tiny little leaf. The end.

I know it's not much, but for me, it's pretty cool. I will keep practicing and trying out new things. Who knows, maybe the next nail art post will be even better. Let's hope so!

Luv & Luk,
--L.

Tuesday, May 17, 2011

My Favorite 10 Nail Polishes: Part One

I've been thinking of some new blog posts to share with you, Pretties, and I've been coming up dry. But I did see this on another blog and I'm so sorry I can't say who did this or where I saw it. I forgot!

So, I'm going to share with you my favorite 10 nail polishes but I decided to split it in two segments.

I have no particular order in which I like these, I just know I do.
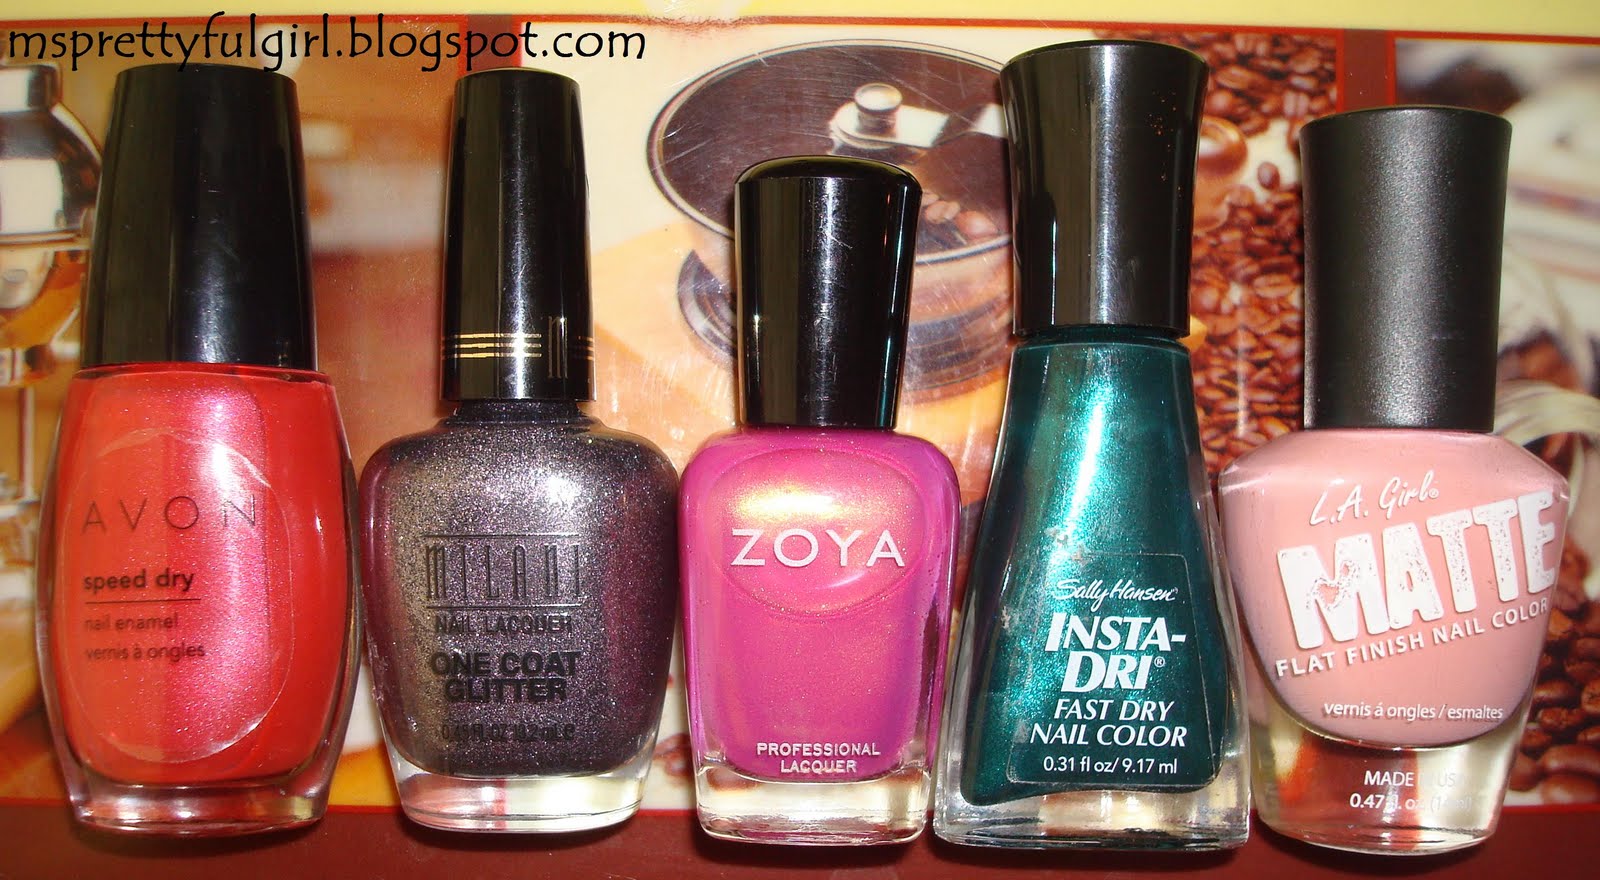
Left to Right:
Avon Speed Dry Nail Enamel in S312 Mambo Melon
Milani Nail Lacquer One Coat Glitter in 522 Silver Dazzle
Zoya Professional Lacquer in ZP609 Reece
Sally Hansen Insta-Dry Fast Dry Nail Color in 4917-22 Jumpin' Jade
L.A. Girl Matte Flat Finish Nail Color in NL538 Matte Baby Pink

Swatches without flash.
Swatches with flash.
Mambo Melon is such a pretty and vibrant coral with slight pink shimmer. Perfect for summer!

Silver Dazzle is pure glitter, coarse glitter. Like a disco ball!

Reece is maybe my #1 (if I was putting them in actual order). It is a pink with gold duo chrome.


Jumpin' Jade is awesome. One coat is so opaque. Very pretty teal. I see spring!

Matte Baby Pink is sweet and innocent. It's a really cute color.

**All nail polishes were swatched using 2 coats.**

Do you ladies own any of these? Do you like any of these??

Luv & Luk,
--L.

♥♥All nail polishes in this post were bought with my own money. These are my own thoughts and opinions.♥♥